

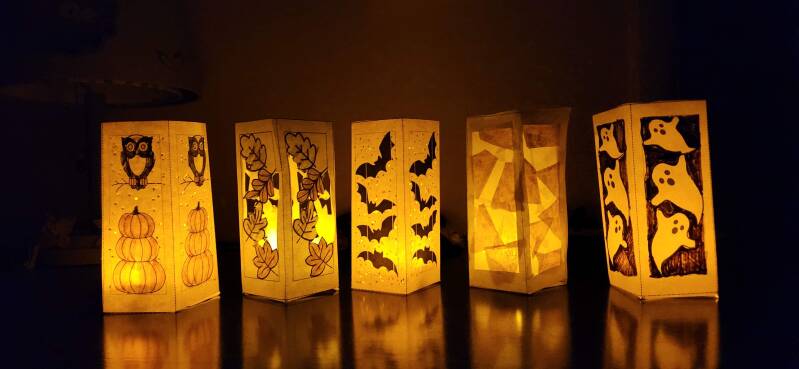
I absolutely love the fall season for science. There is always so much to discover! Changing leaves, bird migrations, dwindling daylight and so much more. I especially love all the exciting chemistry that can fit within a fall or Halloween theme, but, sometimes, we need an activity that isn’t so messy and that’s where this fun paper lantern comes in. This activity is perfect for fall or winter when the sun goes down sooner, the air is chillier, and we all start seeking out some coziness.
What happens when you place a little light inside a paper lantern? The cutout windows shine, tissue paper glows, and some parts of the lantern stay dark. Those differences give children something to investigate: why does light pass through some materials more easily than others?
This paper lantern activity brings art and science together using a printable template and a battery-operated tea light. It works as a seasonal classroom activity, a homeschool investigation, or a creative project at home. Our 5th graders make these every year during their class Halloween party and it’s such a big hit! It’s not only a cute craft and a lasting seasonal decoration but can be a fun science investigation as well. As children decorate and build, their choices become opportunities to explore how light interacts with materials.
Start with a question
Before assembling the lanterns, give children a chance to predict what will happen. Hold a piece of paper in front of the tea light, then compare it with tissue paper or clear plastic. Ask: Which material lets the most light through? Which makes the light look softer? Can you still see the light source clearly?
Children do not need to know all the vocabulary before they begin. Let them describe what they notice in their own words, then introduce scientific terms that help them explain their observations. A comment like “I can see the glow, but not the candle” is a useful starting point for discussing translucent materials.
Make a Halloween paper lantern
Gather these supplies:
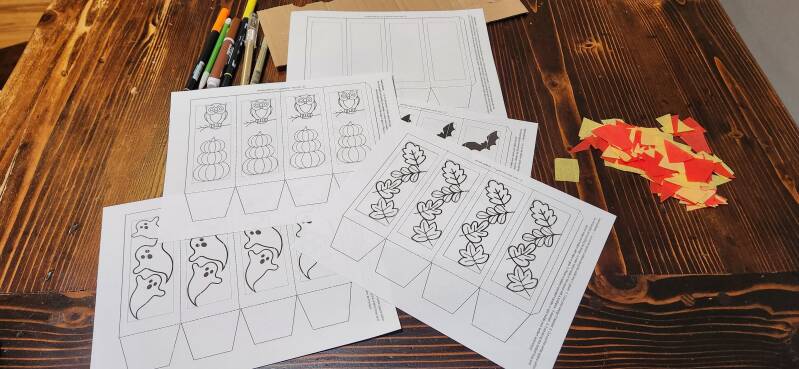
- A printable Halloween paper lantern template (recommend printing on regular white printer paper)
- Markers, crayons, or colored pencils
- Scissors and tape or glue
- A battery-operated LED tea light
- Optional tissue paper, clear plastic, or extra paper for comparing materials
Use battery-operated lights only. Paper lanterns should never be used with a real candle or open flame. Adults can help with detailed cuts or prepare the openings for younger children.
- Cut out the lantern outline along the solid line.
- Color the design and decide where light should shine through. Cut away the white spaces around the designs as directed on the template, or have an adult help make small holes.
- For a materials comparison, use the blank template to create windows. Leave one open and cover others from the inside with tissue paper, clear plastic, or an extra piece of paper.
- Fold along the dotted lines and secure the side and bottom with tape or glue.
- Place the LED tea light inside and observe the lantern in a dim area.
Keep the light easy to remove so children can switch it off and make changes to their designs. Before dimming the room, ask them to predict which parts will look brightest.
Different Ways to Let Your Light Shine
There are so many variations to how you can try when decorating the "windows" of your lanterns.
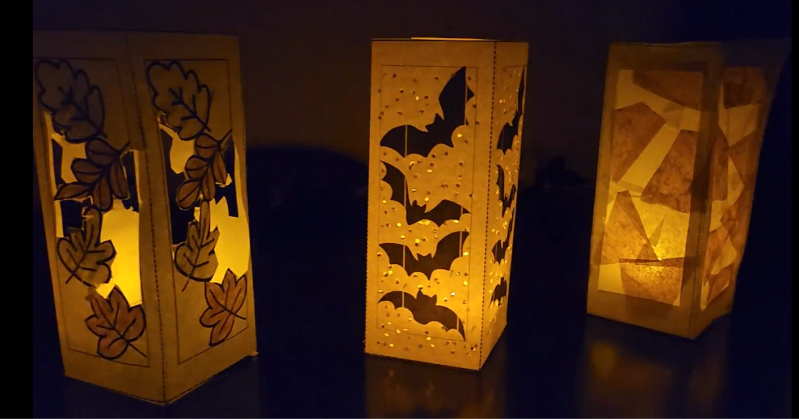
One way is to simply color it. You can see if different colors allow more or less light through.

Alternatively, you can poke holes all around it for a starry appearance. To do this, place your paper on a piece of cardboard and use a pencil to poke the holes.

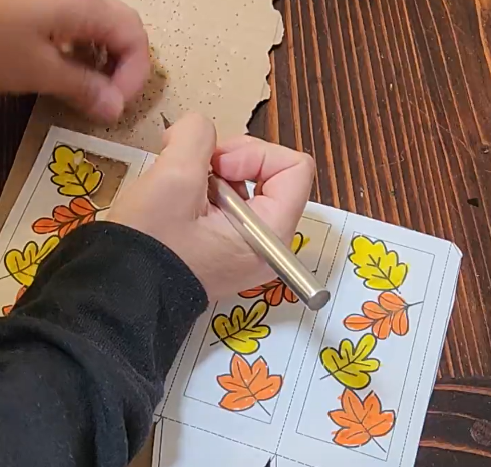
Another option is to cut away sections of lantern so that light can shine brightly through the open areas. I find that using an exacto knife on a cutting mat or cardboard creates the most precise cuts but scissors can work, too.

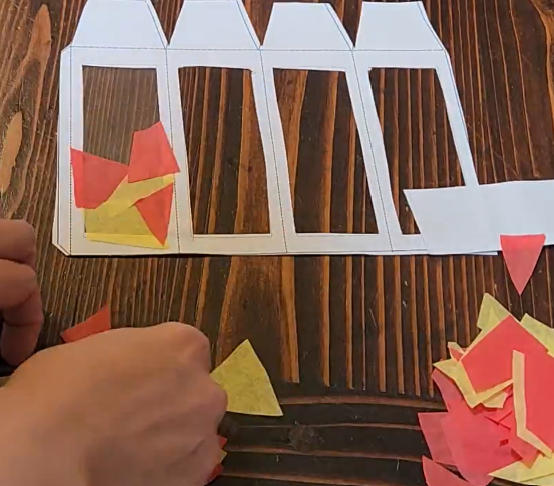
Some students like to cut away the entire window and replace it with tissue paper. We've found this to be easiest to do by cutting contact paper to fit inside the window and then adhering the tissue pieces to that.

Why do some parts glow?
When light reaches a material, some may pass through it, some may reflect from its surface, and some may be absorbed. A single material can do more than one of these things. What children see depends on the material, its thickness, and the light source.
Transmission means light passes through a material. Clear plastic is usually transparent: it lets light through with little scattering, so objects behind it remain clear. Tissue paper is usually translucent: it transmits some light but scatters it in different directions, making the light source look less distinct. That scattering helps create the soft glow of a lantern window.
Opaque materials block light from passing through. Cardstock often behaves this way, but ordinary printer paper may let some light through. That makes testing worthwhile. Ask children to compare one layer with two rather than assuming every kind of paper will behave the same way.
An uncovered cutout lets light travel through the air in the opening without passing through a paper wall. The paper shapes around it block more light, creating a bright-and-dark design.
Reflection happens when light bounces off a surface. It is also how we see the outside of the lantern when room light reflects from the paper and enters our eyes. Absorption happens when a material takes in light energy. Colored tissue paper absorbs some wavelengths of visible light more than others, so the light coming through can appear colored.
Turn the craft into an investigation
Once the lanterns are assembled, you can being to explore.
Try these questions:
- What changes when you add a second layer of tissue paper?
- Can you see the light source clearly through each material?
- What happens when you cover an open window?
- Which material would you choose for a lantern with a soft glow? What observation supports your choice?
Older students can draw a model showing light traveling from the tea light to a window, with arrows for transmission and reflection and labels for absorption. Younger children can point to places where light passes through or is blocked.
The same ideas appear in familiar objects. A window lets us see outside, a lampshade softens light, and a curtain can block it. Ask children to look around and find another object that uses a material to change how light passes through.
My Paper Lantern activities include printable designs, a blank template for creating your own lantern, teacher guidance, and a vocabulary and observation worksheet. Use it to start a conversation about light, then let children test the questions that come from their own designs. I have two versions for fall and winter so your lantern themes can fit the season.
When the lanterns are finished, take a moment to compare them. Which design creates the effect each child wanted? What would they change next time? A glowing Halloween decoration becomes a chance to make predictions, gather evidence, and use what they learn to improve a design. Let them enjoy their finished lanterns, share what they noticed, and follow a question a little further. Sometimes a simple project is all it takes to spark the next discovery. As the evenings grow darker and chillier, I hope these little lanterns bring some light and coziness to your classroom or home.
